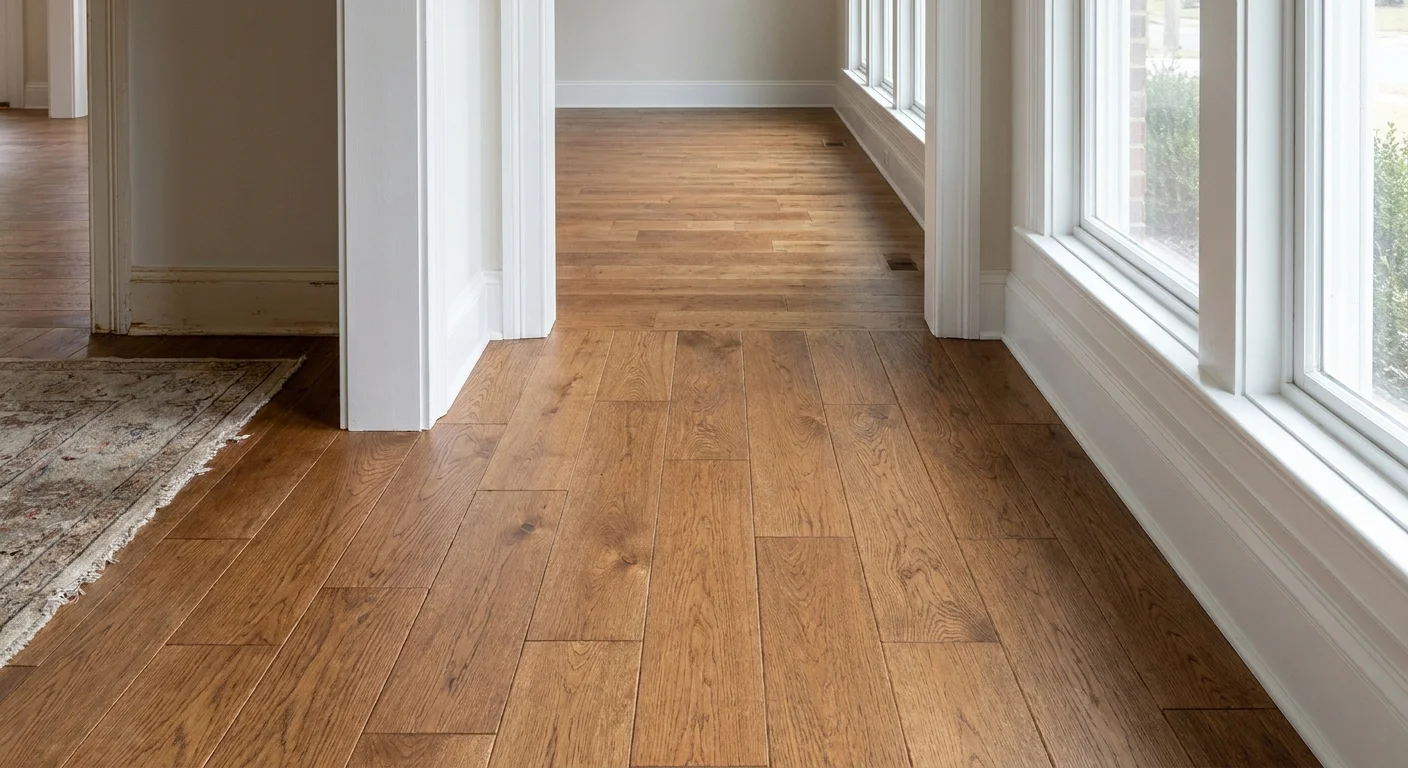
Extending existing hardwood floors into a new room, an addition, or a former carpeted area in your New Jersey home can significantly enhance its value and aesthetic appeal. In 2026, homeowners increasingly seek seamless transitions between old and new flooring, a goal that is entirely achievable with expert techniques and meticulous attention to detail. This process involves careful assessment, precise material matching, and often a comprehensive refinishing of both old and new surfaces to create a unified, harmonious look.
Can New Hardwood Floors Truly Match Existing Ones?
Yes, achieving a near-perfect match between new and existing hardwood floors is often possible, even if the original floors are decades old. The key lies in a professional approach that considers every variable, from wood species to finishing techniques. While an exact, invisible match can be challenging due to factors like wood aging and previous finishes, skilled craftsmen can blend the two surfaces so effectively that the transition is virtually imperceptible.
Understanding the Challenges of Blending Old and New
The primary challenges in matching new hardwood to existing floors stem from the natural evolution of wood over time. Old floors have typically undergone years of exposure to UV light, foot traffic, and environmental changes, leading to a unique patina and color depth. New wood, on the other hand, starts with its natural, unaged hue. Bridging this gap requires expertise in wood science and finishing.
The Role of Professional Expertise in Seamless Integration
Professional hardwood specialists possess the knowledge and tools to overcome these challenges. They understand how different wood species react to stains and finishes, how to manipulate color to achieve a desired blend, and the technical skills required for precise installation. This expertise is crucial for achieving a result that looks like a single, continuous floor, rather than a patchwork.
What Factors Influence a Perfect Match?
Several critical factors influence the success of matching new hardwood to existing floors. These include the original wood species, board dimensions (width and thickness), cut (e.g., plain sawn, quarter sawn), grade, and the existing finish type. A comprehensive assessment of these elements is the first step towards formulating an effective matching strategy. For new hardwood installation projects in New Jersey, IAC Home Improvement brings extensive experience to ensure these factors are meticulously addressed. You can learn more about our hardwood installation services.
How Do Experts Identify Your Existing Hardwood Specifications?
Identifying the precise specifications of your existing hardwood is a crucial diagnostic step in the matching process. Our experts conduct a thorough on-site evaluation to determine the characteristics of your current flooring, ensuring that any new materials selected will be compatible and visually cohesive.
Species and Grade Identification
The first step is to accurately identify the wood species. Common species in New Jersey homes include Red Oak, White Oak, Maple, and Hickory, each with distinct grain patterns and color tones. We also assess the wood's grade, which refers to its appearance, including the number and size of knots, mineral streaks, and color variations. Matching species and grade is fundamental to achieving a consistent look.
Board Dimensions: Width and Thickness
Accurate measurement of the existing boards' width and thickness is essential. Hardwood boards come in various standard and custom dimensions, and matching these exactly is vital for a smooth, even surface. Common widths range from 2-1/4 inches to 5 inches or more, while thickness is typically 3/4 inch for solid hardwood. Using mismatched dimensions can create noticeable seams and an uneven floor plane.
Understanding Cut and Grain Patterns
The way wood is cut from the log (plain sawn, quarter sawn, rift sawn) significantly impacts its grain pattern. Plain sawn wood, for example, often exhibits a cathedral-like grain, while quarter sawn wood has a straighter, more linear pattern. Understanding and matching this cut is important for visual continuity, especially in areas where the new and old floors will be directly adjacent.
Lace-In or Threshold: What's the Best Way to Blend New and Old Floors?
When extending hardwood flooring, homeowners typically face a choice between a "lace-in" technique for a seamless look or using a "threshold" for a defined transition. The best method depends on the project's scope, the desired aesthetic, and structural considerations.
Seamless Lace-In Technique
The lace-in technique, also known as weaving or feathering, is the preferred method for achieving a truly continuous hardwood floor. This involves carefully removing the ends of existing boards where the new flooring will begin and then weaving the new boards into the old ones. This interlocking method eliminates the need for a transition strip, creating an unbroken surface that flows naturally from one area to the next. It’s a labor-intensive process, requiring precise cuts and expert installation, but yields the most professional and aesthetically pleasing result.
Strategic Use of Thresholds
Thresholds, or transition strips, provide a clear demarcation between different flooring types or between existing and new hardwood sections. While not as seamless as a lace-in, a well-chosen threshold can still offer a clean and intentional transition. This method is often more cost-effective and quicker to install. It's particularly suitable when there's a slight height difference between the floors, or when extending into a doorway where a natural break point already exists. Thresholds come in various materials and profiles, allowing for aesthetic customization.
Considering Room Layout and Flow
The decision between lace-in and threshold should also consider the overall room layout and desired flow. For open-concept spaces or hallways where continuity is paramount, a lace-in creates an expansive feel. In contrast, for distinct rooms or areas with different functions, a threshold can reinforce spatial divisions. Our team in Monmouth County, including towns like Long Branch and Red Bank, can help assess your specific layout and recommend the optimal solution for your home.
Ready to explore options for matching your hardwood floors? (848) 358-7694 to discuss your project, or text us a photo for a quick consultation. You can also get a free estimate online.
Why is Sanding and Refinishing Key to a Seamless Blend?
Even with perfectly matched wood species and dimensions, the ultimate secret to a truly seamless blend between old and new hardwood floors lies in sanding and refinishing both areas together. This unified approach ensures that the entire surface accepts stain and finish uniformly, resulting in a cohesive color and sheen.
The Science of Color Matching
New wood and old wood, even of the same species, will absorb stains differently due to age, previous finishes, and environmental exposure. Sanding both areas down to bare wood removes all existing finishes and opens the wood grain, allowing for a fresh start. This creates a consistent base for stain application, making it possible to achieve a uniform color across the entire expanded floor. Our experts use custom tinting and blending techniques to precisely match or complement existing tones, or to create an entirely new look.
The Refinishing Process for Consistency
After the new hardwood is installed and laced into the existing floor, the entire area undergoes a comprehensive sanding process. This involves multiple passes with progressively finer grits of sandpaper to achieve a perfectly smooth surface. Once sanded, a wood conditioner may be applied, followed by the chosen stain and then several coats of protective finish. This unified application ensures that the color, sheen, and durability are consistent across the entire floor, eliminating any visible lines or differences between the old and new sections. Hardwood floor refinishing typically costs from $2-$4 per square foot, with projects starting from $1,600.
The Importance of a Unified Finish
Applying a new, unified finish to both the old and new sections is crucial for long-term consistency and protection. Different finishes (e.g., oil-based polyurethane, water-based polyurethane, or natural oils) have unique characteristics in terms of appearance, durability, and maintenance. By applying the same finish across the entire floor, you ensure uniform protection against wear, moisture, and UV damage, extending the life and beauty of your blended hardwood. You can explore more about this process on our hardwood refinishing service page.
What Does the Hardwood Matching and Installation Process Involve?
The process of matching and installing new hardwood to existing floors is a multi-phase project that requires careful planning and execution. Understanding the typical timeline and what each stage entails helps homeowners prepare for the transformation of their living spaces, whether in Freehold, Holmdel, or Asbury Park.
Pre-Installation Preparations
Before any new wood is laid, several critical steps ensure a successful outcome. This includes acclimating the new hardwood planks to your home's humidity and temperature for several days to prevent future warping or gapping. The subfloor must also be prepared, ensuring it is clean, dry, level, and structurally sound. Any existing flooring, such as old carpet or tile, will be removed, and the subfloor inspected for repairs.
A Step-by-Step Project Timeline
Most hardwood matching and installation projects follow a predictable sequence, typically taking several days to a week or more depending on the scope. Here's a general timeline:
| Phase | Typical Duration | Description |
|---|---|---|
| Day 1-3 (Pre-Work) | 2-3 Days | Material delivery & acclimation. Subfloor prep, old flooring removal. |
| Day 4-6 (Installation) | 1-3 Days | New hardwood installation, including lace-in or threshold work. This is when the new boards are physically laid. |
| Day 7-9 (Sanding & Staining) | 1-3 Days | Full sanding of both old & new floors to bare wood. Application of stain (if chosen). |
| Day 10-12 (Finishing) | 1-3 Days | Application of multiple coats of protective finish. Drying time between coats. |
| Day 13+ (Cure & Move-In) | 7-14 Days | Initial light foot traffic allowed. Full cure for furniture placement & rugs. |
What to Expect During Installation
During the installation phase, our team will meticulously lay the new hardwood, ensuring proper alignment and secure fastening. For lace-in projects, this involves precise cutting and fitting of boards into the existing floor. Hardwood installation labor, for straight-lay solid or engineered wood, typically starts from $4 per square foot, while intricate patterns like herringbone or chevron labor can start from $12 per square foot. The wood material itself is chosen and priced separately, with projects generally starting from $1,300 for installation. Expect some noise from power tools and a temporary disruption to the work area.
How Do I Prepare My Home and Live During the Project?
Preparing your home properly and understanding daily life during a hardwood flooring project can minimize stress and ensure a smoother process. Our team at IAC Home Improvement, serving areas like Middletown and Manalapan, guides you through every step.
Essential Pre-Project Checklist
A little preparation goes a long way. Here's what you should do before our team arrives:
- Clear the Area: Remove all furniture, rugs, and personal belongings from the rooms where work will be done. This includes items from closets within the work zone.
- Protect Valuables: Remove any wall hangings, fragile items, or electronics from adjacent rooms, as vibrations can cause them to fall.
- Secure Pets: Arrange for pets to be boarded or kept in a safe, secluded area away from the work zone, as the noise and activity can be distressing.
- Access for Crew: Ensure clear pathways for our crew to bring in materials and equipment.
- Dust Control: While we take extensive measures to control dust, covering sensitive items or sealing off doorways to non-work areas can provide extra protection.
Daily Life During Hardwood Work
Hardwood installation and refinishing is an invasive process, and daily life will be impacted. Expect workers to be present during business hours, typically Monday through Friday. Access to the work areas will be restricted, and you may need to plan alternative routes within your home. For multi-day projects, particularly those involving refinishing, you might need to make arrangements for temporary accommodation if the fumes are strong or access to essential areas like kitchens or bathrooms is blocked.
Managing Dust, Noise, and Access
Dust: Despite using dust containment systems and vacuums, some level of fine dust is inevitable. We employ plastic sheeting and tape to seal off work zones, minimizing its spread. Noise: Power tools for installation, sanding machines, and air compressors generate significant noise. This is most pronounced during the installation and initial sanding phases. Access: Depending on the scope, certain areas of your home may be inaccessible for periods. For instance, after finishing coats are applied, the floor needs time to dry, meaning no foot traffic for at least 24-48 hours. Our team will communicate daily progress and access restrictions clearly. Remember, IAC Home Improvement is a full-service home improvement company, capable of handling not just flooring, but also kitchen and bathroom remodeling, painting, carpentry, and more, providing one trusted contractor for your entire home improvement needs.
What Happens After Installation: Curing, Care, and Longevity?
Once your new and old hardwood floors are seamlessly blended and finished, the project isn't quite over. Understanding the crucial post-installation steps, including curing times and proper care, ensures the longevity and beauty of your investment.
Understanding Cure and Dry Times
While your newly finished floors may feel dry to the touch within 24-48 hours, they are not fully cured. Most polyurethane finishes require a full cure time of 7-14 days. During this period, the finish is hardening and reaching its maximum durability.
- Light Foot Traffic: Typically allowed after 24-48 hours.
- Furniture Placement: Wait at least 72 hours before returning light furniture. Lift, don't drag.
- Rugs and Mats: Avoid placing rugs or mats on the floor for at least 7-14 days to allow the finish to breathe and fully cure.
- Heavy Objects: Wait for the full cure time before moving heavy appliances or furniture.
Adhering to these guidelines is crucial to prevent damage to the still-curing finish.
Initial Care for Your Blended Floors
During the first few weeks, treat your new floors with extra care. Avoid spills, keep pet claws trimmed, and use furniture pads under all legs to prevent scratches and dents. Do not use harsh chemical cleaners; a dry dust mop or vacuum with a soft brush attachment is best for initial cleaning. Consult our hardwood installation guide for detailed care instructions.
Long-Term Maintenance for Durability
For long-term durability and to maintain the beautiful, seamless look of your blended floors, consistent maintenance is key. Regularly sweep or vacuum to remove grit that can scratch the finish. Clean spills immediately. Use only manufacturer-recommended hardwood floor cleaners and avoid excessive water. Re-coating the finish every few years, or a full refinish every 7-10 years, can extend the life of your floors significantly. For all your flooring needs, including hardwood, luxury vinyl plank, and carpet, visit our flooring services page.
Frequently Asked Questions
Can I match new hardwood to existing floors if they are different species?
While challenging, it is sometimes possible to match different wood species, especially if both are to be stained and refinished together. The success depends on the grain patterns and how well the different woods accept stain. Often, a darker stain is used to help camouflage the differences. However, the most seamless results typically come from matching the original wood species.
How long does the entire matching and refinishing process take?
The total duration for matching new hardwood to existing floors, including installation, sanding, staining, and finishing, typically ranges from 7 to 14 days for most residential projects. This timeframe includes crucial drying and curing periods between finish coats. Larger or more complex projects, such as those involving extensive lace-in work or multiple rooms, may take longer.
Will there be a noticeable difference in height between the old and new floors?
A professional installation aims for a perfectly flush transition between old and new floors. Our experts meticulously ensure that the new boards are installed at the same height as the existing ones. If there are minor subfloor inconsistencies, these are addressed during preparation to prevent any noticeable height differences or tripping hazards, ensuring a smooth, continuous surface.
Is it always necessary to refinish the entire existing floor when adding new hardwood?
While not strictly "always necessary," refinishing the entire existing floor along with the new installation is highly recommended for the best results. It allows for a unified sanding, staining, and finishing process, which is critical for achieving a seamless color match and consistent sheen. Without it, even with perfectly matched wood, the color and finish difference between old and new can be quite noticeable.
Authoritative resource: National Wood Flooring Association.