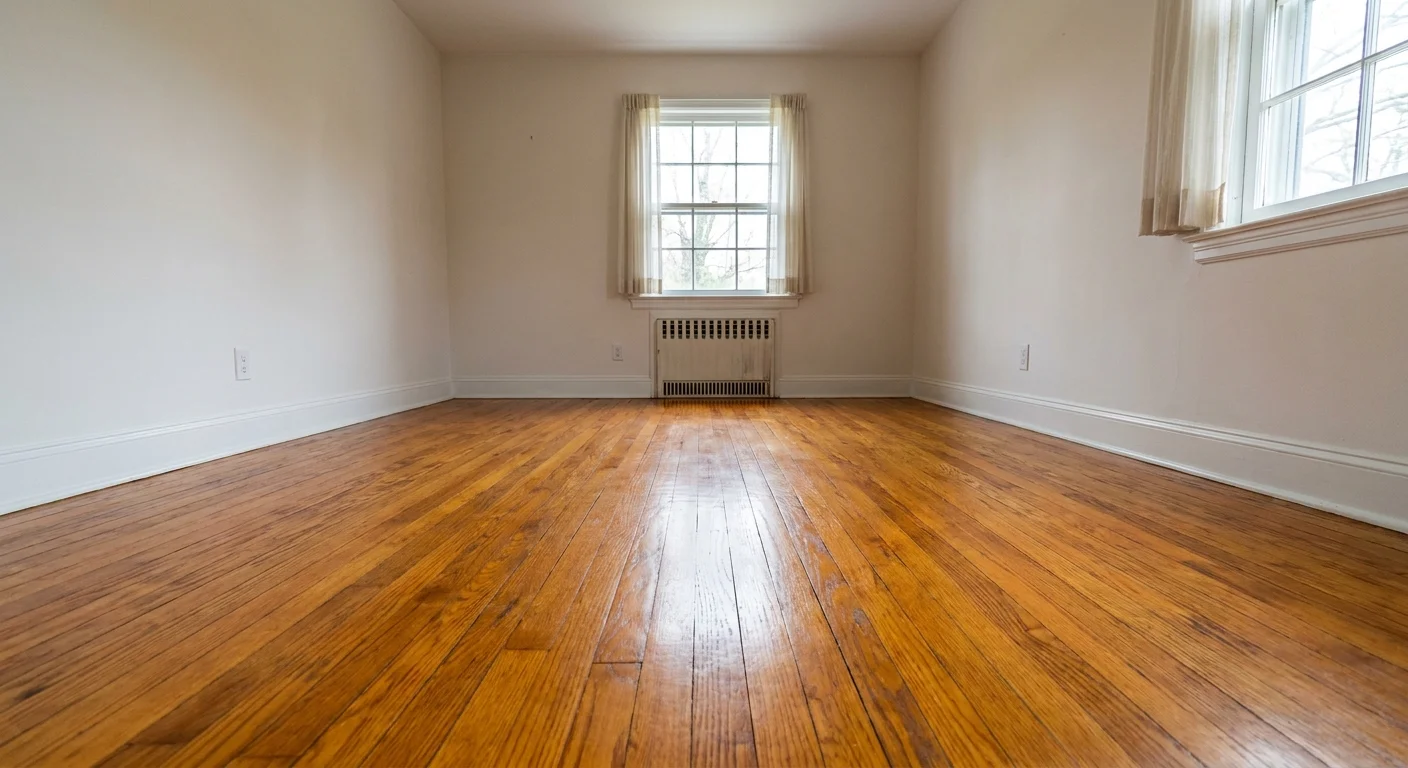
In Monmouth County, New Jersey, homeowners discovering original hardwood floors under old carpets can typically expect professional restoration costs from $2-$4 per square foot in 2026, with most projects starting around $1,600. This guide from IAC Home Improvement details the complete process of evaluating and restoring these hidden treasures, offering a clear roadmap for bringing your home's historic charm back to life.
Uncovering a Gem: Is Your Hidden Hardwood Worth Saving?
Finding hardwood floors beneath old carpeting is often an exciting discovery, but the initial condition can vary widely. Before committing to restoration, it's crucial to assess the extent of the damage and the wood's inherent quality to determine if it's a viable candidate for refinishing.
The Initial Assessment: What to Look For
Once the carpet and padding are removed, take a close look at the exposed wood. Check for consistent wood species, board width, and overall structural integrity. Pay attention to areas near walls, doorways, and under heavy furniture, as these often reveal the floor's original condition.
Look for signs of previous water damage, significant gouges, or areas where boards are loose or missing. Identifying the type of wood, such as oak, maple, or pine, is also important, as different species respond differently to sanding and finishing. A professional assessment by an expert like IAC Home Improvement can accurately determine the wood's potential.
Common Damage: Staples, Stains, and Missing Boards
The most common issues encountered are remnants from the carpet installation itself. Thousands of staples, tack strip holes around the perimeter, and adhesive residue are typical. While these are usually superficial and can be addressed during sanding, extensive adhesive can require more intensive removal.
Pad stains, often dark and rectangular, result from moisture getting trapped under the carpet padding over time. Pet stains, particularly from urine, can penetrate deep into the wood fibers, causing permanent discoloration and odor. Missing or severely damaged boards, especially around vents or previous renovations, may require careful patching or replacement with matching reclaimed wood.
Understanding Different Wood Types and Their Potential
The type of hardwood you uncover significantly influences the restoration process and final outcome. Red oak and white oak are common in older homes across New Jersey and are excellent candidates for refinishing due to their hardness and ability to accept stains beautifully. Pine, while softer and prone to dents, can also be restored for a rustic, charming look.
Exotic woods or older, rarer species might require specialized techniques. A professional can identify the wood species and advise on the best approach, ensuring the restoration enhances its natural beauty and durability. For a deeper dive into hardwood refinishing, explore our dedicated service page on hardwood floor refinishing.
What Does Hardwood Floor Restoration Involve? The Process Explained
Hardwood floor restoration is a multi-phase process that transforms worn, damaged wood into a beautiful, durable surface. It typically involves meticulous preparation, precision sanding, and expert application of stains and protective finishes.
Phase 1: Preparation and Initial Repairs
The first step after carpet removal is a thorough cleaning and inspection. All remaining staples, nails, and tack strips must be carefully pulled. Any loose boards are re-secured, and severely damaged or missing planks are repaired or replaced. This foundational work ensures a stable and even surface for sanding.
For pet-stained areas, specialized treatments may be attempted to neutralize odors and lighten discoloration, though deep stains might remain as character marks. Gouges and deep scratches are filled with wood filler matched to the existing wood, preparing the floor for the sanding stages.
Phase 2: Sanding for a Flawless Finish
Sanding is the heart of the restoration process, removing old finishes, surface damage, and preparing the wood to accept new stain and sealant. This is typically done in multiple passes using professional-grade sanders with progressively finer grits of sandpaper.
The first pass with a coarse grit removes the bulk of the old finish and surface imperfections. Subsequent passes with medium and fine grits smooth the wood to a silky texture, eliminating sanding marks and preparing the pores for optimal stain absorption. Dust containment systems are crucial during this phase to minimize airborne particles.
Phase 3: Staining and Sealing for Durability
Once the sanding is complete and the floor is meticulously cleaned of all dust, the staining process begins. Homeowners can choose from a wide array of stain colors, from light natural tones to rich dark hues, to complement their home's aesthetic. A sample application is often recommended to ensure satisfaction with the chosen color.
After the stain dries completely (which can take 12-24 hours depending on the product and humidity), multiple coats of a durable protective finish are applied. Options include oil-based polyurethane for a classic amber glow and excellent durability, or water-based polyurethanes for a clearer finish and faster drying times, often preferred for their lower VOCs. Each coat requires adequate drying time, usually 2-6 hours, before the next application.
The IAC Home Improvement Advantage: Full-Service Expertise
Choosing IAC Home Improvement means partnering with a team that understands the nuances of hardwood restoration and home improvement. As a full-service company serving Monmouth County, Long Branch, and beyond, we manage every detail from initial assessment to the final finish. You can trust our experienced professionals for a seamless project.
Ready to see if your hidden hardwood can be saved? We offer free on-site measurements and consultations. Call us today at (848) 358-7694, text us a photo of your floors, or get a free estimate online to begin your restoration journey.
A Step-by-Step Timeline for Hardwood Restoration
Understanding the typical timeline for hardwood floor restoration helps homeowners plan and prepare for the project. While specific durations can vary based on floor size, condition, and finish choices, most standard refinishing projects follow a predictable schedule.
Before Work Begins: Preparing Your Home
Proper preparation is key to a smooth restoration project and protects your belongings. This checklist outlines essential steps:
- Clear the Room: Remove all furniture, rugs, wall hangings, and decor from the area where work will be done. For larger items, consider temporary storage or moving them to another part of the house.
- Remove Existing Flooring: If you're removing carpet yourself, ensure all padding, tack strips, and staples are completely gone.
- Protect Adjacent Areas: Seal off doorways to other rooms with plastic sheeting and painter's tape to help contain dust. Turn off HVAC systems during sanding to prevent dust circulation.
- Secure Pets and Valuables: Arrange for pets to stay elsewhere or be securely confined away from the work area. Move any delicate or valuable items to a safe, dust-free location.
- Address Baseboards: Decide if you want to remove baseboards before sanding to achieve a cleaner edge, or if they will be protected with tape.
The Daily Workflow: What to Expect On-Site
A typical hardwood refinishing project for an average-sized room (e.g., 250-400 sq ft) often spans 3-5 days. Here's a general breakdown:
| Day | Activity | Notes |
|---|---|---|
| Day 1 | Setup, Prep, Coarse Sanding | Remove staples, initial repairs, first rough sanding passes. Significant noise & dust. |
| Day 2 | Fine Sanding, Edging, Buffing | Progressively finer sanding grits, edge work, final buffing. Less dust, still noisy. |
| Day 3 | Stain Application | Floor cleaned thoroughly, stain applied. Drying time (12-24 hours). Odor present. |
| Day 4 | First Coat of Finish | First protective topcoat applied. Drying time (2-6 hours). Odor present. |
| Day 5 | Final Coat of Finish | Second or third finish coat applied. Final drying time. Limited access. |
This timeline is an estimate. Larger areas, complex repairs, or specific finish systems (like oil-modified polyurethanes that require longer drying) can extend the project by a day or two. For more detailed information on timelines and factors affecting cost, refer to our blog post on hardwood floor refinishing cost in NJ for 2026.
Post-Restoration: Curing, First Weeks, and Long-Term Care
Once the final coat of finish is applied, the floor needs time to cure properly. While it may feel dry to the touch within hours, the finish is still hardening and developing its full durability. Here’s what to expect:
- Light Foot Traffic: Typically allowed after 24-48 hours. Avoid shoes with hard soles or heels.
- Furniture Placement: Wait 72 hours (3 days) before moving furniture back. Use felt pads under all furniture legs to prevent scratches.
- Rugs and Heavy Items: Refrain from placing area rugs or heavy appliances back for at least 7 days to allow the finish to fully cure and off-gas.
- Initial Cleaning: For the first week, avoid wet mopping. A dry dust mop or vacuum with a soft brush attachment is sufficient.
- Long-Term Care: Regularly sweep or vacuum to remove grit. Use cleaning products specifically designed for hardwood floors. Promptly wipe up spills.
Proper care in the first few weeks and ongoing maintenance are vital to preserving the beauty and longevity of your newly restored hardwood floors. Our hardwood refinishing tips for NJ homeowners provide more guidance on maintaining your floors.
Living Through the Restoration: Noise, Dust, and Access
Undertaking a hardwood floor restoration project means temporary disruptions to your daily routine. Understanding what to expect regarding noise, dust, and access can help you plan and minimize inconvenience for your family in towns like Red Bank, Asbury Park, or Middletown.
Managing Dust: Containment and Air Quality
Despite advancements in dust containment technology, some level of fine wood dust is inevitable during sanding. Professional contractors like IAC Home Improvement utilize high-powered vacuums and dust extractors attached directly to sanding equipment to capture the majority of particles. We also seal off work areas with plastic sheeting and tape to minimize spread to other parts of your home.
However, sensitive individuals, especially those with allergies or respiratory conditions, might consider staying elsewhere during the most intensive sanding days. After the work is complete, a thorough cleaning of all surfaces, including walls and ceilings, may be necessary to remove any settled dust.
Noise Levels and Work Hours
Sanding machines are powerful tools and generate significant noise. Expect loud, continuous noise during the sanding phases (typically Day 1 and 2). This can be disruptive, especially if you work from home or have young children.
Most contractors adhere to standard work hours, typically 8 AM to 5 PM, but it's always good to discuss the expected schedule with your project manager. During staining and finishing, noise levels decrease significantly, but the presence of workers and the need for drying time will still impact the home environment.
Navigating Your Home During the Project
Access to the rooms undergoing restoration will be severely limited or completely restricted for the duration of the project. During sanding, the area is an active construction zone. During staining and finishing, you'll need to avoid walking on the wet finish to prevent damage and track marks. This means planning alternative routes through your home, especially if the work is in a main living area or hallway.
For multi-room projects, work might be phased to allow some areas to remain accessible. Discuss your family's needs and daily routines with your contractor to establish a practical work plan.
Protecting Pets and Valuables
Pets should be kept away from the work area at all times. The noise, dust, and strong odors from stains and finishes can be stressful or even harmful to animals. Consider boarding pets or having them stay with friends or family for the duration of the project.
All valuable or fragile items should be removed from the work area and any adjacent rooms where dust might settle. While precautions are taken, it's always best to err on the side of caution to protect cherished possessions.
Restore or Replace? Making the Best Flooring Decision for Your Monmouth County Home
When you uncover hardwood under carpet, the decision often comes down to restoration versus replacement. This choice depends on the condition of the existing floors, your budget, aesthetic goals, and the overall value you want to add to your home in towns like Freehold, Holmdel, or Colts Neck.
When Restoration is the Smart Choice
Restoring existing hardwood is almost always the preferred option when the floors are structurally sound and have sufficient thickness for sanding. Original hardwood floors, especially those from older homes in Monmouth County, often possess a character and quality that is difficult to replicate with new materials.
Restoration is generally more environmentally friendly, as it reuses existing resources. It can also be a more cost-effective solution compared to installing new hardwood, especially if the existing subfloor is in good condition. With professional refinishing, even floors with significant surface damage can be transformed, retaining their historical charm and adding considerable value to your home.
Considering New Hardwood or Alternative Flooring
There are instances where restoration might not be the most practical or economical choice. If the existing hardwood is severely damaged beyond repair, has been sanded too many times, or is a very thin veneer, new flooring might be necessary. In such cases, options include installing new solid or engineered hardwood, which typically costs labor from $4 per square foot for a straight lay (projects from $1,300), with wood priced separately.
Other popular alternatives include luxury vinyl plank (LVP), which offers excellent durability and water resistance at about $8 per square foot all-inclusive (projects from $1,300), or new carpet, with labor from $3 per square foot including pad installation (projects from $800). For projects requiring new hardwood installation, IAC Home Improvement provides expert services; learn more on our hardwood installation page.
Understanding the Costs: Restoration vs. Installation
As noted, hardwood floor refinishing typically costs from $2-$4 per square foot, all-inclusive, for projects starting from $1,600. This includes sanding, staining, and applying protective coats. This can be a very attractive option compared to the cost of new materials and installation.
For new hardwood installation, labor alone starts from $4 per square foot, with the cost of the wood added on. Specialty patterns like herringbone or chevron installation can have labor costs from $12 per square foot. The total cost will depend heavily on the type and grade of wood chosen. While restoration focuses on breathing new life into existing floors, new installation offers the flexibility of choosing any wood species or finish you desire, but often at a higher overall price point. IAC Home Improvement provides transparent, project-total quotes after a free on-site visit for all services.
Why Choose IAC Home Improvement for Your Hardwood Restoration in NJ, NY, PA?
When you're ready to transform your hidden hardwood floors, choosing the right contractor makes all the difference. IAC Home Improvement brings expertise, reliability, and a commitment to quality to every project, whether you're in Manalapan, Eatontown, or anywhere across NJ, NY, and PA.
Expertise You Can Trust
With years of experience since 2015 and a 5.0 rating on Google with over 100 reviews, IAC Home Improvement is a trusted name in flooring and home renovations. Our team of skilled professionals understands the intricacies of different wood species, sanding techniques, and finish applications to ensure a superior result. We are fully licensed (NJ License #13VH13143000, PA License #PA188007) and committed to industry best practices.
Seamless Project Management
We believe in a stress-free experience for our clients. From your initial free estimate and consultation to the final walkthrough, our project managers ensure clear communication, adherence to timelines, and meticulous attention to detail. We provide one clear project total after a free on-site measurement, so you know exactly what to expect without hidden fees.
Beyond Flooring: Your Full-Service Partner
At IAC Home Improvement, we're not just about floors. We are a full-service home improvement company capable of handling your entire project. Whether it's a complete kitchen or bathroom remodel, interior or exterior painting, custom carpentry, basement finishing, deck construction, or masonry and concrete work, we offer comprehensive solutions. This means you can rely on one trusted contractor for all your home renovation needs, simplifying your project and ensuring cohesive results.
Frequently Asked Questions About Hardwood Restoration
How much does it typically cost to refinish hardwood floors?
Professional hardwood floor refinishing typically costs from $2-$4 per square foot, all-inclusive, for projects starting around $1,600. This price usually covers sanding, staining, and applying multiple coats of protective finish. Actual costs can vary based on the size of the area, the condition of the existing floors, and the specific finish chosen.
How long does hardwood floor restoration usually take?
Most standard hardwood floor restoration projects for an average-sized room (e.g., 250-400 sq ft) typically take 3-5 days from start to finish. This includes preparation, multiple sanding passes, staining, and the application of several coats of protective finish, each requiring drying time. Larger areas or extensive repairs may extend the timeline.
Can pet stains or water damage be completely removed from hardwood?
The success of removing pet stains or water damage depends on their depth and severity. Surface-level stains can often be fully removed during sanding. However, deep pet urine stains or extensive water damage that has penetrated deep into the wood fibers or caused rot may be permanent. In such cases, board replacement might be necessary, or the remaining discoloration may become a unique "character" mark.
What is the best way to care for newly restored hardwood floors?
For newly restored hardwood, avoid heavy foot traffic for 24-48 hours and wait at least 72 hours before moving furniture back (using felt pads). Do not place rugs or heavy items for 7 days to allow the finish to fully cure. For ongoing care, regularly sweep or vacuum with a soft brush, and use cleaning products specifically designed for hardwood floors. Promptly wipe up spills to maintain their beauty and longevity.
Authoritative resource: National Wood Flooring Association.